
切换深色模式
OpenClaw 配置教程
本文档用于说明如何安装 OpenClaw,并将模型配置到 UUCode/中转平台网关中使用。
1.1 安装 Node.js 环境
所有工具都需要 Node.js 环境才能运行。
- 打开浏览器访问 https://nodejs.org/
- 点击 LTS 版本下载并安装
安装完成后,执行以下命令验证是否成功:
bash
node --version
npm --version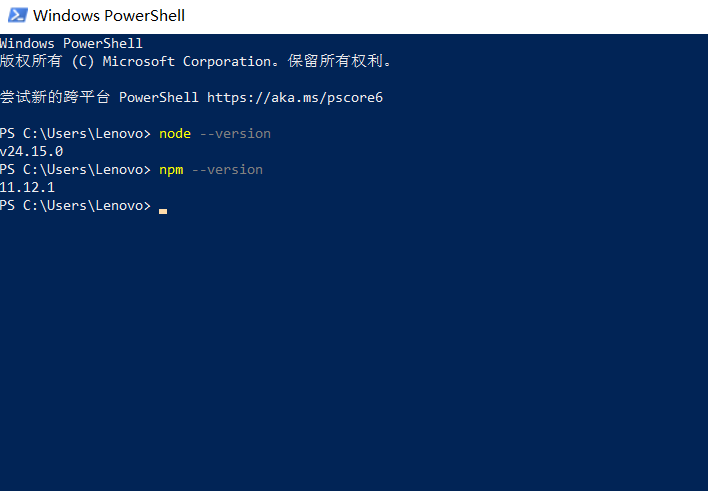
1.2 安装 OpenClaw
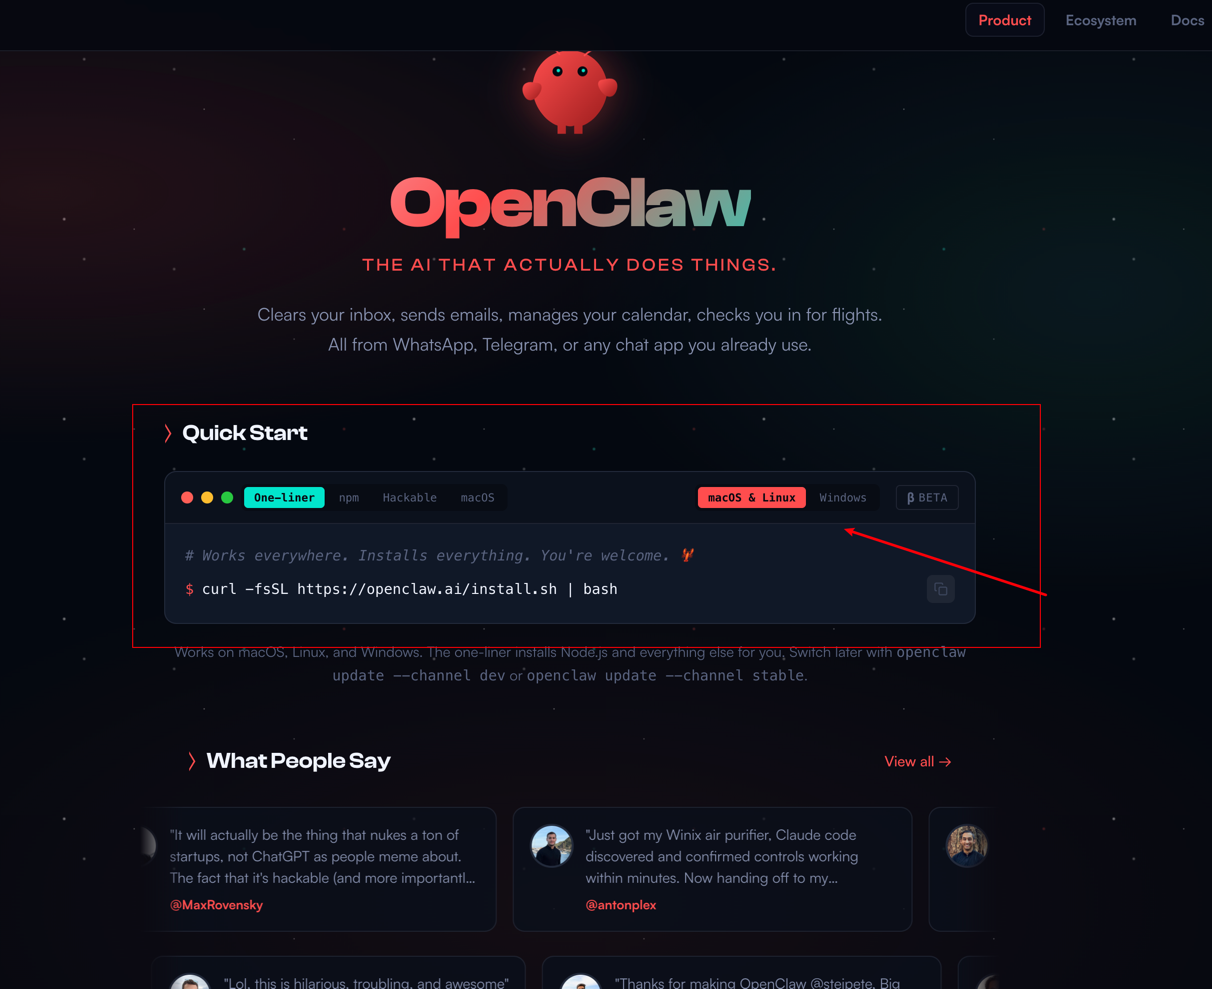
第一步:安装openclaw
OpenClaw 官网: https://openclaw.ai/
- 根据不通过环境使用不同的安装方式
第二步:使用 NPM 安装并初始化
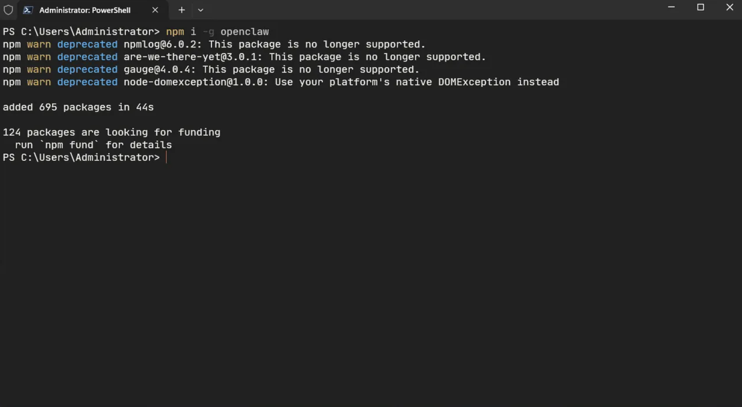
如果第一种安装方式不行,优先使用 NPM。
bash
# 安装
npm i -g openclaw

# 初始配置
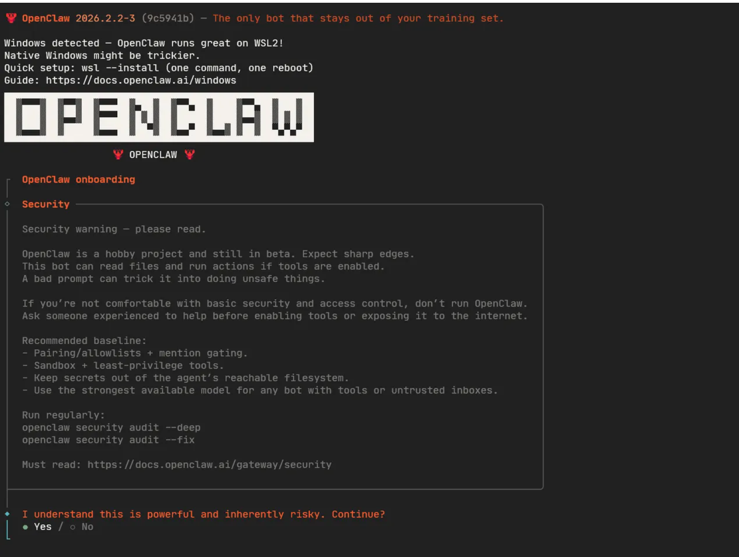
openclaw onboard
初始化过程中会看到安全风险提醒,请先阅读后继续。
- 建议选择“快速开始”配置
- 初期以“跳过”大部分选项为主,后续手动修改配置文件更稳妥
- 如果需要第三方聊天平台,请留意 channel 选项(推荐飞书)
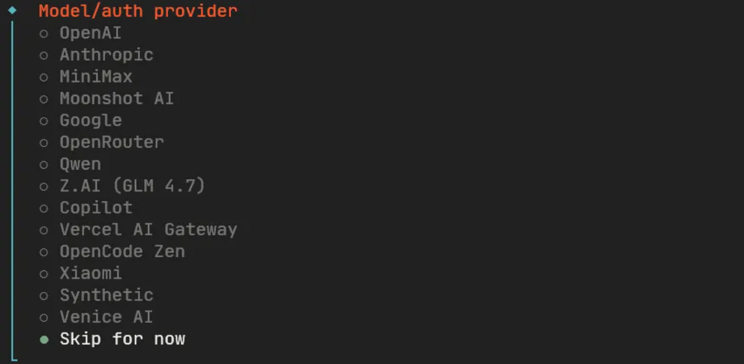
说明:
- 如果你此前安装过,会出现
restart / reinstall / skip - 确认旧配置没问题可选
restart或skip - 不放心可选
reinstall - 可安装为服务模式;若担心风险,也可以先不安装服务
1.3 配置方法
找到 OpenClaw 配置文件 openclaw.json,按需替换模型地址和密钥。
常见路径:
- Windows:
C:\Users\你的用户名\.openclaw\openclaw.json - macOS:
~/.openclaw/openclaw.json - Linux:
/home/你的用户名/.openclaw/openclaw.json
方案 A:单独使用 Codex
json
{
  "agents": {
    "defaults": {
      "model": {
        "primary": "uucode/gpt-5.3-codex"
      },
      "models": {
        "uucode/gpt-5.3-codex": {
          "alias": "codex"
        },
        "uucode/gpt-5.2": {
          "alias": "5.2"
        },
        "uucode/gpt-5.3": {
          "alias": "5.3"
        },
        "uucode/gpt-5.4": {
          "alias": "5.4"
        }
      },
      "thinkingDefault": "high"
    }
  },
  "models": {
    "mode": "replace",
    "providers": {
      "uucode": {
        "baseUrl": "https://token.uucode.top",
        "api": "openai-responses",
        "auth": "api-key",
        "authHeader": true,
        "headers": {
          "User-Agent": "Mozilla/5.0"
        },
        "apiKey": "你的key",
        "models": [
          {
            "id": "gpt-5.3-codex",
            "name": "GPT-5.3-Codex",
            "api": "openai-responses",
            "reasoning": true,
            "input": ["text", "image"],
            "cost": {
              "input": 0,
              "output": 0,
              "cacheRead": 0,
              "cacheWrite": 0
            }
          },
          {
            "id": "gpt-5.2",
            "name": "GPT-5.2",
            "api": "openai-responses",
            "reasoning": true,
            "input": ["text", "image"],
            "cost": {
              "input": 0,
              "output": 0,
              "cacheRead": 0,
              "cacheWrite": 0
            }
          },
          {
            "id": "gpt-5.3",
            "name": "GPT-5.3",
            "api": "openai-responses",
            "reasoning": true,
            "input": ["text", "image"],
            "cost": {
              "input": 0,
              "output": 0,
              "cacheRead": 0,
              "cacheWrite": 0
            }
          },
          {
            "id": "gpt-5.4",
            "name": "GPT-5.4",
            "api": "openai-responses",
            "reasoning": true,
            "input": ["text", "image"],
            "cost": {
              "input": 0,
              "output": 0,
              "cacheRead": 0,
              "cacheWrite": 0
            }
          }
        ]
      }
    }
  }
}
如需把默认模型改成 gpt-5.4,可以让 AI 直接改配置,提示词示例:
text
你现在找到我本机安装 openclaw 的配置路径,找到 openclaw.json 配置文件,现在我要将默认模型改成 gpt-5.4,需要你给我修改配置。
baseUrl:https://token.uucode.top
apiKey: 【你的key!!!】此处要修改
你需要先熟悉下当前的配置文件,然后先将此配置文件进行备份,然后在配置文件修改,修改时不要影响其他功能,只做模型配置的改动,修改后要做 review,没问题后帮我重新启动 openclaw。
方案 B:单独使用 Claude
json
{
  "agents": {
    "defaults": {
      "model": {
        "primary": "uucode/claude-sonnet-4-6"
      },
      "models": {
        "uucode/claude-opus-4-6": {
          "alias": "opus"
        },
        "uucode/claude-sonnet-4-6": {
          "alias": "sonnet"
        }
      },
      "thinkingDefault": "high"
    }
  },
  "models": {
    "mode": "replace",
    "providers": {
      "uucode": {
        "baseUrl": "https://token.uucode.top",
        "api": "anthropic-messages",
        "auth": "api-key",
        "authHeader": true,
        "apiKey": "你的key",
        "models": [
          {
            "id": "claude-opus-4-6",
            "name": "claude-opus-4-6",
            "api": "anthropic-messages",
            "input": ["text", "image"]
          },
          {
            "id": "claude-sonnet-4-6",
            "name": "claude-sonnet-4-6",
            "api": "anthropic-messages",
            "input": ["text", "image"]
          }
        ]
      }
    }
  }
}
建议默认使用 claude-sonnet-4-6,opus 消耗较快,可在复杂任务时再指定。
如需让 AI 自动修改默认 Claude 模型,提示词示例:
text
你现在找到我本机安装 openclaw 的配置路径,找到 openclaw.json 配置文件,现在我要将默认模型改成 claude-sonnet-4-6,需要你给我修改配置。
baseUrl:https://token.uucode.top
apiKey: 【你的key!!!】此处要修改
你需要先熟悉下当前的配置文件,然后先将此配置文件进行备份,然后在配置文件修改,修改时不要影响其他功能,只做模型配置的改动,修改后要做 review,没问题后帮我重新启动 openclaw。
方案 C:Codex + Claude 混合使用
json
{
  "agents": {
    "defaults": {
      "model": {
        "primary": "opus/claude-opus-4-6"
      },
      "models": {
        "opus/claude-opus-4-6": {
          "alias": "opus"
        },
        "uucode/gpt-5.3-codex": {
          "alias": "codex"
        }
      },
      "thinkingDefault": "high"
    }
  },
  "models": {
    "mode": "replace",
    "providers": {
      "uucode": {
        "baseUrl": "https://token.uucode.top",
        "api": "openai-responses",
        "auth": "api-key",
        "authHeader": true,
        "headers": {
          "User-Agent": "macos-terminal-test"
        },
        "apiKey": "你的key",
        "models": [
          {
            "id": "gpt-5.3-codex",
            "name": "GPT-5.3-Codex",
            "api": "openai-responses",
            "reasoning": true,
            "input": ["text", "image"],
            "cost": {
              "input": 0,
              "output": 0,
              "cacheRead": 0,
              "cacheWrite": 0
            }
          }
        ]
      },
      "opus": {
        "baseUrl": "https://token.uucode.top",
        "api": "anthropic-messages",
        "auth": "api-key",
        "authHeader": true,
        "apiKey": "你的key",
        "models": [
          {
            "id": "claude-opus-4-6",
            "name": "claude-opus-4-6",
            "api": "anthropic-messages",
            "input": ["text", "image"]
          }
        ]
      }
    }
  }
}
字段说明(可选):
input:模型支持的输入模态(text/image)cost:仅用于成本统计或展示,不影响请求本身
如需让 AI 自动改成“GPT + Claude 混合,默认 claude-opus-4-6”,提示词示例:
text
你现在找到我本机安装 openclaw 的配置路径,找到 openclaw.json 配置文件,现在我要将模型改成 gpt 与 claude 搭配使用,默认使用 claude-opus-4-6,需要你给我修改配置。
baseUrl:https://token.uucode.top
apiKey: 【你的key!!!】此处要修改
你需要先熟悉下当前的配置文件,然后先将此配置文件进行备份,然后在配置文件修改,修改时不要影响其他功能,只做模型配置的改动,修改后要做 review,没问题后帮我重新启动 openclaw。
1.4 启动 OpenClaw
bash
# 停止
openclaw gateway stop

# 开启
openclaw gateway start

# 重启
openclaw gateway restart
说明(重要):
- 上面 3 个命令是服务模式(计划任务)
- 如果服务未安装,可能提示
Scheduled Task not installed或send failed: Error: gateway not connected - 安装服务(管理员 PowerShell):
bash
openclaw gateway install
openclaw gateway start- 前台运行(不走服务):
bash
openclaw gateway
# 或
openclaw gateway run- 启动后先检查状态:
bash
openclaw status看到 Gateway ... reachable 才算成功,然后再开新终端窗口使用 OpenClaw。
补充:run 是前台运行,终端一关就停;install/start 才是后台服务模式。
1.5 常见命令
bash
# 查看状态
openclaw status

# 查看日志(跟随)
openclaw logs --follow

# 打开控制面板(不自动打开浏览器)
openclaw dashboard --no-open

# 自动修复
openclaw doctor --fix

# 版本升级
openclaw update
1.6 常见问题
权限不足
如果执行 openclaw gateway stop/start 提示权限不足:
- 请用管理员身份打开系统命令行工具后重试
LLM request timed out
通常是网络环境问题:
- 先关闭代理/梯子后重试
- 若仍失败,检查本地网络或防火墙策略
400 Instructions are required
- 检查配置是否为
Responses新格式 - 确保 OpenClaw 已升级到较新版本(建议执行
openclaw update)